Saturday, May 31, 2014

Pocket Money Rewards for Children…


As a bit of a Hodge Podge housekeeper, I struggle with the ability to manage my daughter’s natural tendencies, inherited from me I am sure, to be messy and a little lazy when it comes to tidiness. So I find the best reward system for our home is a pay per task system, allowing her to earn her pocket money, hopefully teaching her the value of money rather than giving pocket money as a handout.

On our kitchen bench is a container full of reward sticks. Each task is allocated an amount based on its importance and the amount of work it takes, from 10-20c for everyday tasks like making her bed to 50c or more for bigger once a week or occasional task. 

Whenever she completes a task she takes a reward stick and off she goes, when she wants some pocket money, she presents her sticks, we add them up and pay her.

So today I thought I would share my little printable sticks for other's looking for a system that's fun and works. I have made a handful of generic tasks that are often done in our household and a couple of 'bonus' tasks that I use for those occasions when she does something that is not covered. I have removed the value so you can add your own amounts to each tasks.
 
Printable Reward Sticks
Easy peasy to make, roughly cut out the printables, glue to jumbo paddle pop sticks, I painted mine but you could leave them plain if you didn't want to make more work. Then I removed the excess paper from around the stick with an emery board, nail file would work well too but you can buy packs of 20 or more cheap emery boards at any dollar store and they are a great tool for crafting, I even use them in my jewellery making. It gives a nice clean finish.

How do you manage your pocket money and household tasks with you children, do you have any unique ideas that get the kids working happily, please share if you do as I would love to find more ways to get my daughter motivated to help around the house.

Friday, May 30, 2014

10 Top Tips that Help Me Survive Working from Home...


For the last few years I have been working from a home based studio making jewellery and whilst I love not having the deal with the commute, working from home has its own challenges.

It takes a certain amount of discipline and organisation (my husband would laugh at the idea that I am organised). Whilst there is freedom in working from home, there are also negatives, there is something to be said about a traditional work environment where you walk out the door at the end of the day and forget about it until the next morning, this tends not to happen when you work from home. 

So today I am sharing the top tips that help me keep me sane.


Tip No. 1 - Routine.
Have a daily routine, get dressed as though you are planning to go to work. You http://www.freedigitalphotos.net/images/Computing_g368-Woman_In_Bathrobe_With_Computer_p125901.htmlwill be more productive if you feel like you are going to work rather than rolling out of bed, lolling around in pj’s. Of course you don’t have to dress up like you might for an office, but dress in a way that makes you feel good. 

When I dress I look at myself and think ‘If I had to go out without warning, could I walk out the door happy with the way I look’ if the answer is no, then change. It will give you a more positive outlook on the day and give the feeling of structure. 

Tip No. 2 - Have a Plan. Start each day with a plan for what you need and want to achieve. I have two whiteboards in my office, once for standard routine and one for specific tasks that I update each morning as needed. 

Tip No. 3 - Prioritise. Make sure the above plan is prioritised, what absolutely ‘has to be done’ that day and what you would like to achieve as an extra. But don’t stress the failures and interruptions, there will be days when you just cannot achieve what you want so don’t beat yourself up about it. 

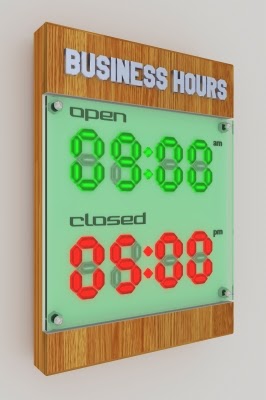
http://www.freedigitalphotos.net/images/business-hours---digital-led-light-photo-p204633Tip No. 4 - Set Office Hours. Just because you work from home does not mean you should be available and working 24 hours a day. Set yourself office hours, not necessarily 9-5pm hours, but hours that work for you and your circumstances. 

For me, I work in my studio from 9am to 2.45pm, with a lunch break. Then I work on my blog, social media, paperwork and admin from 3.30pm to 5.30pm. Of course, you have to be flexible and sometimes these interchange and I might work on blog and paperwork in the morning and studio work in the afternoon, but I try to have a basic routine.

Tip No. 5 - Learn to Say No. This is a big one for me, saying no is something I struggle with on a daily basis. I have often found myself tearing my hair out as I promised to meet a deadline that was unrealistic because I could not say no.

http://www.freedigitalphotos.net/images/woman-walking-outdoor-photo-p182953 Tip No. 6 - Get Out, Take a Break. 
Yes, I realise this is a bit 'duh' but take regular breaks and at least once a day get out of the office/studio or workspace. For me just doing the school run each day is sometimes all the break I get if I am busy, but even this is something. 

Take the dog for a walk, sit on your patio with a coffee, drive to your local supermarket and shop for dinner, it doesn’t have to be exciting or social, but for me, if I don’t get out of the house even for a short time I go stir crazy. 

Tip No. 7 - Music. Working from home on my own I find silence lonely, so I am far more productive and happier when I have music cranked up in the background. Of course, this is not important for everyone, some people love the peace, or have young babies to consider. But I achieve so much more when the silence is not pressing in on me. 

Tip No. 8 – Organize Your Space. This is an area I struggle with also, not being the tidiest of people, my desk can look like a war zone. But I am far more productive when my workspace and studio are tidy and organised. I can find things quickly, I http://www.freedigitalphotos.net/images/Other_Science_and_Te_g342-Computer_Repair_p102663.htmlcreate without having to clear a space first and achieve more. There are days when I walk into my studio, look around at the mess and walk out again as I cannot face dealing with it. 

These days nothing useful gets done and I find its better to waste a day tidying and organising my studio so I can be creative and productive following the clean up. I try to have a 'tidy up' day once a month to keep things under control.

Tip No. 9 - Have a designated Workspace.
I realise this is not always possible, but having a workspace separate from your living space allows for a feeling of work life balance. If your workspace is set in the middle of your dining room or lounge room, it can make it hard to separate the two. My workspace is a spare bedroom and when I walk out each night I close the door, it feels a little like leaving the office, without the horrible commute. 
http://www.freedigitalphotos.net/images/Hot_drinks_g184-Typography_Coffee_Cup_p39850.html

Tip No. 10 - Take time Off. When necessary, don’t be afraid to take the day off, if you are sick, stay in bed. If you need a break, feeling overloaded and need time off, take it. Work it into your schedule if you can, if not, just take a sickie, the world will not end if you spend one day just relaxing and recovering from exhaustion. 

Bonus Tip No. 11 - Coffee is a MUST. Haha, just kidding, this is not for everyone, but it certainly is for me. I could not survive without my caffeine fix.   


I hope my favourite tips help you organise your work life and give a little balance. If you have any work from home tips and rules you follow, please share them so we can all learn from each other and make our lives better one little hint at a time.


Thursday, May 29, 2014

Mirror Mirror...

Fairy tales abound at the moment with fantasy shows everywhere on TV and the new Maleficent movie coming out. So today I am sharing a little Snow White inspired collage of beautiful mirrors to decorate your home. 

Of course, these one's don't talk and unfortunately won't tell us all that we are the fairest in the land, but you can't have everything!

Mirror, Mirror...


Tuesday, May 27, 2014

Wrap It...

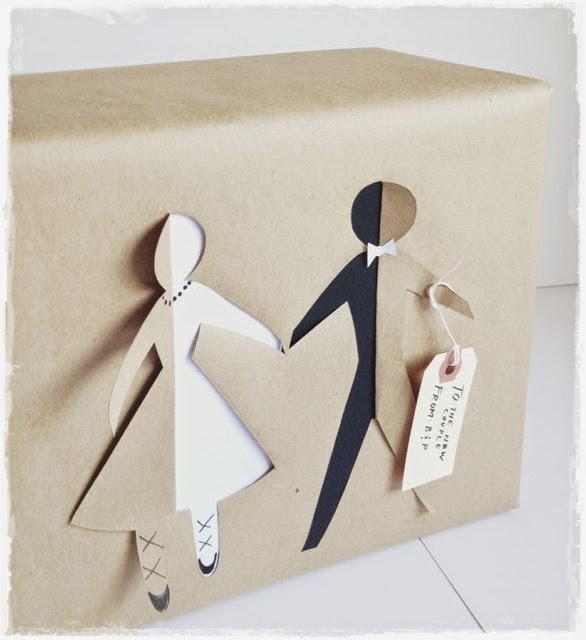
Over the next few months, weddings will abound. It's that time of year when the flowers bloom and people love to get married. And of course, the dreaded wedding presents. Now if you are lucky and your bride and groom have a registry that does all the work for you, you can pick something, have it wrapped and delivered. Of course its a little generic and impersonal as they all end up looking alike.

Why not make yours stand out and wrap it yourself with these great DIY wrapping ideas to add a little something special to your gift.

How about a unique idea for wrapping a groomsman's gift or a bridal gift for your husband to be.

Or something really funky for a modern twist to a wedding present.  
 
 
Then of course black and white is always bold and stands out in a crowd.


But you can't beat a really simple idea with a rainbow of colours for something different. 


See now there are no excuses for boring presents, a little ingenuity can give some real personality to any present. Visit my Wrap It PInterest board for more present wrapping inspiration.


Monday, May 26, 2014

Creative Jobs in the Community Series...

As an Artisan Jeweller, I am highly focused on all things handmade and creative. It took me many years to figure my direction, and even today, I am still struggling with the desire to create versus the commercial need to earn a living.

I have a 12 year old who is extremely creative and artistic, she loves all things Manga and is obsessed with drawing and fashion and is an extremely good writer. She heads into high school next year and the career decision is looming and it weighs heavily on me. Its a real balancing act between the Practical Vs the Creative. There's the desire to see them happy and fulfilled, encourage them to build a creative future and follow their dreams no matter what, even if that may not be financially rewarding; then there is the need to steer them towards a more practical avenue, look for ways to build a creative career that can also be financially rewarding.

As a teenager, I was discouraged from actively developing a career in arts, not because my parents did not understand my needs, but they were concerned about the need to survive, to put a roof over your head and pay the bills and to their mind, a creative career would not provide that security. They directed me towards a very practical direction based on my school results, but one that I hated. Needless to say I dropped out after 2 years, the creative soul in me was slowly dying from boredom and I could never see myself as an Accountant. Unfortunately, in dropping out I never really got my feet heading in the right direction until later in life.

This is something I want to avoid with my daughter. I want her to have the freedom to do what she loves, but as a parent, I now understand why mine made the choices they did. I want to her not just survive, but to thrive.

This has lead me to thinking about the kind of creative careers that are possible, careers that can be both stimulating and financially viable and rewarding in every way. Over the following weeks and months I am going to do a little research and share with my readers a series of posts all about creative careers and hopefully share a little bit of knowledge with you whilst guiding me on making the right decisions about where to encourage my daughter to focus her talents.

The series will focus on some of the most common creative jobs that provide the ability for a steady career progression, including Dressmaker or Fashion Designer; Photographer; Jeweller; Graphic Designer; Architect; Interior Designer, Animators/Illustrators, Writers and of course, Fine Artists. In reality these are
just the starting point really, there are so many more I could share, but these will cover many of main category of jobs out there for those who are more creative than practical.

The first article in the series will start with: Creative Jobs in the Community, Dressmaker or Fashion Designer!


Sunday, May 25, 2014

A Little of This..A Little of That...My Strawberry Cream Pie


Sunday Roast was a big thing in my household, every Sunday my mother would cook a beautiful roast dinner with all the trimmings, set out all the formal dinnerware and Waterford crystal glasses. It was an occasion; Sundays were a day for family and friends with lots of love and laughter, well, most of the time.

She still does it, every week when she manages to get family and/or friends together for lunch and it’s a little occasion for her. She loves to entertain.

My favourite part of Sunday lunch was dessert, every week would be something special, some weeks would be a new fancy dessert that was 'in vogue' at the time, Tiramisu, Crème Caramel, Trifle, Cheesecake of all sorts, Mousse and whatever she found in the recipe magazines for the week (now whilst these may not sound gourmet to you, back when I was young they were pretty popular, of course now days they are old hat desserts). Then there would be the weeks with the old favourites, Apple Pie, Caramel Tart and more. Let me just say, my mother is a fabulous sweet cook, actually, she is great with most things, but she is especially
good with desserts and sweets.

Growing up, my favourite dessert was a dish my mother called Strawberry Cream Pie. It was a recipe she claims to have made up by taking a little of this and a little of that recipe and it is, to this day, my favourite. Delicious, but not exactly quick and easy to make as it has a pie base, set custard layer and set strawberry cream layer.

So after discovering the new strawberry flavoured cream cheese in the supermarket this week I thought I would take a leaf out of my mother's book, I took a little of this, and a little of that from a few favourite recipes and Voila. My own little version of a Strawberry Cream Pie.


Ingredients:

1 Punnet of Strawberries
(keep a few for decoration)
- chopped into small pieces.
2/3 Cup Sugar
1 Tablespoon of Lemon Juice
1/2 Teaspoon Salt
500gm Strawberry Cream Cheese
1 Cup Thickened cream
- softly Whipped
1 1/4 Cups Chocolate biscuit crumbs
80gms butter, Melted


Method:

Set chopped strawberries in a bowl with sugar, lemon juice and salt and leave to infuse.

Pulverise the chocolate biscuits in a processor until crumbed. Mix in melted butter. Press into the bottom and sides of your pan in an even layer. Bake for 5-7 minutes until set.

I made mine in little individual tins and split the recipe to only make 5 little versions, partly because I felt having a full 'pie' would be too much temptation, partly because I decided to skip the gelatine in my mix to keep it softer, more like a mousse, so using individual tins allowed me to create a 'crust' up the side to hold the filling in, but mostly because my family had eaten half the packet of biscuits before I got the chance to make my dessert so I didn't have enough for a full size pie!

In a bowl whip your cream until soft peaks form and mix with the strawberry flavoured cream cheese, gently fold in chopped strawberries and juices. Spoon into your prepared base and decorate with sliced strawberries and refrigerate 2 hours or until firm.

Of course I was hoping for it to look a little like this, but I have nevery been good at pretty food. But despite the less polished appearance in my tarts above (the shells were too small to keep the filling neatly inside), it's the perfect, quick and easy dessert and enough like my favourite childhood dessert to make me one happy camper!

Actually, I could eat this by itself without a biscuit base, or layered with crumbed chocolate biscuits sprinkled between each layer for some crunch. Yummy.


Saturday, May 24, 2014

Hair with Flair...

Growing up I admired women like Cyndi Lauper, who was not afraid to be different and always had wild hair colours. She also had the personality and lifestyle to pull it off. Of course, for ordinary people walking into an office job in a bank or legal firm wearing neon green hair might just be a little off putting. Now having your hairdresser or even a young assistant in a clothing store sporting these hairstyles seems just right.

I remember as a teenager giggling with my friends when we discussed my grandmother's lilac, pink or blue coloured hair that she died different colours periodically to cover the grey. The colour changed constantly and always soft pastel colours, but as my grandmother had the personality to pull it off, it kind of worked.

Soft and Romantic
These days wild colour hair is so common its almost doesn't turn heads. Of course, you have to have a certain type of personality to pull the look off, I think, and off course being young helps. I definitely think seriously wild hair colours are for the young, watching a 60 year old woman walk around with lime green hair might be a stretch, but then again maybe I am just a little staid.

My daughter loves tinting the tips of her hair during the school holidays with temporary hair colours and hair chalks, having blond hair she can go almost any colour, but her favourites are pink and blue.

http://www.pinterest.com/pin/565131453213788415/
 
So I thought today I would share some the most eye catching on the blog. There is so much inspiration available on PInterest from the soft and romantic to the neon bright. But it doesn't stop here, these are a just a few of the wild selection out there, see more on on PInterest.

Bold, Bright and Neon

Friday, May 23, 2014

My New Favourite Phone App thats made Blogging Better...

The Techie Tool I found for Blogger Convenience...

Now I would have to say I consider myself technologically challenged in some ways. Yes I have a
website and blog and spend a lot of time online. But mostly as a user. The back end continues to baffle me, thank god for WYSIWYG websites and editing.

Anyway, as someone who isn't a real techie I am not much into apps and things. Don't get me wrong I have all the social media and shop apps on my phone, including Etsy, PInterest, Facebook, Google+ and Twitter for when I am out and about, although I can't say I use them very effectively or often. But all the other apps mean nothing to me.

But the other day I was driving my daughter to school and had this great idea for a blog post and the whole post just ran through my head in technicolour. Unfortunately having the brain capacity of a pea I knew that by the time I got home it would be gone. So while I was stopped at the drop off zone outside the school I jumped on the app store looking for something I could use to convert speech to text and found a app called 'Speech to Text'. It is the best thing I did, I set it up to email the recording and just go, while I am driving, only if I can start and stop it whilst parked obviously as safety is super important.

The other night I recorded an idea whilst drying off from the shower. I love it, of course if I am out and about some people do tend to look at you funny for talking into your phone but it's amazing how tolerant we are for weird phone acts in this high technology world we live in.

My only comment would have to be that occasionally when talking from a distance you can get the odd gobbledy-gook word, but I can usually figure out what it was from the context surrounding it and this is a small price to pay for completely losing an idea before you can get it down on paper.

Of course I am not suggesting everyone download this app, although it was free so why not. But it
might not suit everyone, and there are lots of other options out there. But what I will say is that any speech to text app for a busy blogger and people like me who's minds can go a mile minute should be on the top of your must have tools.

Now I am looking for one for my desktop, I love the fact that I can get my ideas out quicker than I can type or get my drafts done hands free which is great for me as a jeweller because I can work and draft my blog posts at the same time. It also means that I can dictate ideas that run through my head without having to worry about wording, this can be a big issue for me as I often have ideas floating around in my head that are a bit disjointed and it gives me a great starting point to turn my ideas into finished format.

Now I know there are those of you who might say just recording your post and typing it up later is just as good, and you may be right, but really, it’s just more work and being a super lazy person who is into shortcuts, this is one less thing I have to do if the draft post I dictate is workable, I just have to copy the email, edit and format any misspelled words and add images. Of course, its not that simple for those ideas that are a little all over the place, but I love it.

It doesn't make the blog posts flow any quicker if you are out of ideas, but it certainly is a great tool, if like me, your best ideas come at the most awkward of times.